Best Homemade Eskimo Pie Popsicle Recipe: the Sweet, Creamy Treats
Eskimo:
Eskimo Pies are an ice treat that can be found in any frozen treat store. Its chocolate flavor and creamy vanilla ice cream filling elicit lots of nostalgia in people when referring to these popsicles, but what if you could try making this frozen delight at your home with fresh ingredients free from preservatives and fake flavors?

In this post, we will talk about how to make the best homemade Pie popsicles from scratch. From ice cream base to chocolate coating, we will cover everything you need to know to create this irresistible frozen treat in your kitchen. But first, some FAQs will guide you in the making of said popsicle. Let’s get started!
Ingredients for Homemade Eskimo Pie Popsicles:
Eskimo:
For the Ice Cream:
- 2 cups heavy cream-this will make your popsicles have a rich and creamy texture
- 1 cup of whole milk-added whole milk will give the ice cream a smooth base
- 1/2 cup granulated sugar-this is to sweeten the ice cream perfectly
- 1 tsp vanilla extract for that classic vanilla taste combined with chocolate.
- 1 tablespoon corn syrup, (optional) This helps retain the smoothness of the chocolate and prevents ice crystals from forming.
Chocolate Coating:
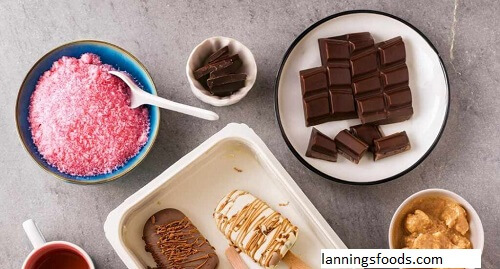
- 6 ounces of semi-sweet chocolate chips, milk chocolate, or dark chocolate
- 1/4 cup coconut oil, to prevent chilling, and to help apply the chocolate evenly, for a nice shine
- 1/2 teaspoon vanilla, a tiny amount helps coat chocolate beautifully and add a depth of flavor.
- Pinch of salt – This will balance the sweetness of the chocolate and allow its depth of flavor it to shine through.
Optional toppings:
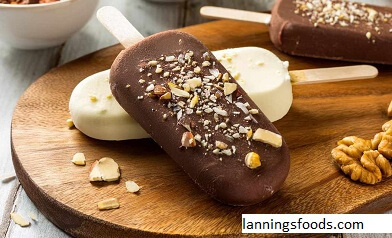
- Chopped nuts (such as almonds, peanuts, or hazelnuts) – Delicious for that extra crunch and nutty twistSprinkles – For a fun pop of color and an extra sweetness level
Step-by-Step Instructions for Homemade Pie Popsicles:
Eskimo:
Step 1: Make the Ice Cream Base
- Mix the Dairy Ingredients: In a large mixing bowl, combine the heavy cream, whole milk, granulated sugar, and corn syrup if using them. Whisk together until the sugar is dissolved and the mixture is smooth.
- Add Vanilla: Add in the vanilla extract that will give the signature flavor to your ice cream.
- Chill the Mixture: Chill the ice cream base in the refrigerator for at least 2 hours, or better yet, overnight. This makes sure that the mixture freezes enough for perfect popsicles with a nice consistency.
Step 2: Pour the Mixture into Popsicle Molds

Get Your Popsicle Molds Ready Clean your popsicle molds well and dry them out. In this fun recipe, you’ll want to insert old-timey wooden popsicle sticks into the molds in case you want to use those with the popsicles. If you’re short on time, you can also use plastic popsicle sticks or forgo the sticks altogether and do Eskimo Pies directly in the molds. Just pour the ice cream base into the molds.
- Fill the molds Pour the ice cream mix into the molds, allowing for a small space at the top for expansion as it freezes. You may also tap the molds on the counter to get rid of air bubbles, making the freezing process more even.
- Freeze the Popsicles position the molds in the freezer and let them freeze for at least 4 hours or until the ice cream is solid. The best results would be by freezing it overnight.
Step 3: Prepare the Chocolate Coating
Meanwhile, while your popsicles are freezing, melt the chocolate chips with coconut oil in a heat-proof bowl. You can do this using a double boiler or microwave. If you use the microwave, then you will heat it in 20-second intervals, and stir it each time until fully melted and smooth.
- Add Vanilla and Salt: With the chocolate melted, mix in vanilla extract as well as a little salt. This will infuse more flavor and give great harmony to the sweetness of the ice cream.
- Cool the Chocolate: Let the melted chocolate cool a bit. You want it to be warm, not hot, to avoid melting your popsicles when you coat them.
Step 4: Enrobe Popsicles in Chocolate
- Remove the Ice Cream from Molds: When the popsicles are thoroughly frozen, remove them from their molds by running warm water over the outside of the mold for a few seconds. Carefully extract the popsicles from their molds.
- Dip the Popsicles: Hold a hold of each popsicle on one of the sticks, dip it into the melted chocolate making sure you are covering all sides of the popsicle. Swirl the popsicle in the chocolate for a smooth, thick coating. Work quick as the cold popsicle will harden almost instantly.
- Optional: Add Toppings: You can roll the popsicle in chopped nuts or sprinkles while the chocolate is still soft to give it some extra flavor and texture.
- Let Chocolate Set: Put the coated popsicles on a parchment-lined baking sheet and freeze them for another 15-30 minutes until the chocolate is completely set.
Step 5: Serve and Enjoy!
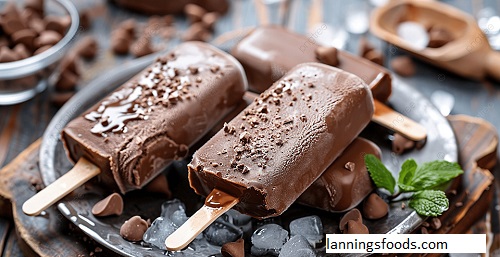
And once this chocolate is set, your homemade Pie popsicles are ready to be enjoyed. They will have a perfect ratio of creamy ice cream and crunchy chocolate coating. The beauty of these is that you know what you’re getting, and you can make them however you want: flavors, toppings, you name it!
- Don’t Fill to the Top: Fill the molds too full, and the ice cream can spill over when it freezes. Leave a little room at the top for the expansion.
- Use Good Chocolate: The chocolate coating is an important part of the flavor, so use some good semi-sweet chocolate.
- Experiment with Flavor Variations: While the vanilla filling of an Eskimo Pie is delicious, you can experiment with adding tons of other flavors to your ice cream base–chocolate, strawberry, or coffee–to create a whole range of Eskimo Pie popsicles.
- Let the Chocolate Cool Slightly: If it’s really hot when you dip your popsicle, it will melt the ice cream; let the chocolate cool down a little.
FAQs About Homemade Pie Popsicles:
Eskimo:
1. Can I make these popsicles without popsicle molds?
Absolutely! If you don’t have popsicle molds, you can use silicone muffin cups, small paper cups, or even ice cube trays. Make sure you insert your popsicle sticks into each mold before freezing them. For mini versions, you can probably just forgo the sticks and dip the ice cream into the chocolate.
2. How can I get the chocolate to be crispy?
Ensure that you add enough coconut oil to the mix. This way, it will give the chocolate a great glossy finish and help the chocolate harden quickly whenever it touches the ice cream.
3. How long will these homemade Pies last in the freezer?
These homemade Eskimo Pie popsicles can be stored for up to 2-3 weeks in the freezer. Make sure to wrap them nicely with plastic covers, or put them inside an airtight container so they won’t end up being free of freezer burn and fresh.
4. Can I make these popsicles using dairy-free ingredients?
Yes! You can substitute the dairy with coconut cream, almond milk, or oat milk so it becomes a dairy-free version. Use dairy-free chocolate and coconut oil for the coating. It will taste a little different, but it is still good!
5. Can I add other mix-ins to the ice cream base?
Absolutely! You can personalize your Pie popsicles by including mix-ins such as chocolate chips, crushed cookies, and fruit, or swirling in a caramel or fudge sauce before freezing. It’s worthwhile noting that be careful not to overload the base because if you add too many add-ins, they will affect the texture and the way it freezes.
Conclusion:
Eskimo:

Enjoy the creamy, indulgent taste of these frozen treats while knowing what’s in them. Smooth vanilla ice cream with a rich chocolate coating will be very appealing whether you are making these for a family treat, a summer party, or just because you are craving something sweet. Making your own Eskimo Pie popsicles at home is a fun and rewarding experience.
Such simple ingredients and a little patience combine to make homemade Pie popsicles that can substitute for those bought from the store but with a personal touch. Experiment with flavors and tops to get creative and make these popsicles into your own.