Kringla Recipe- The Taste of Scandinavian Heritage:
Kringla Recipe:
Give them the flavor of classic cookies. A slight variation on the Kringla Recipe…Try the Scandinaviaische Plunderfest at Kringla. With a delightfully buttery texture that melts in your tongue, Kringla is a simple yet sweet treat that is full of flavor. Due to their ease of preparation and cosy flavor, these spherical cookies are customarily created by hand for special occasions and passed down through the generations. In addition to providing you with a complete recipe to follow and baking techniques to ensure the best results, our piece will explain the background of Kringla.
The Origins of Kringla:
Kringla Recipe:
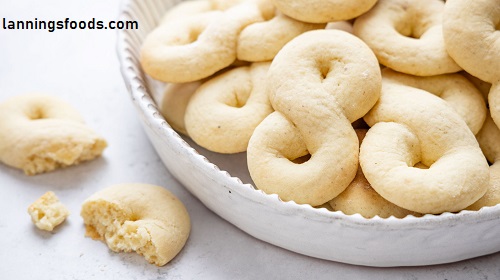
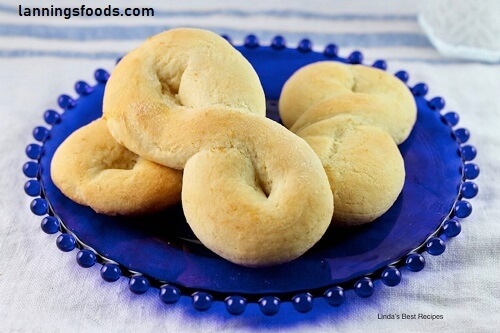
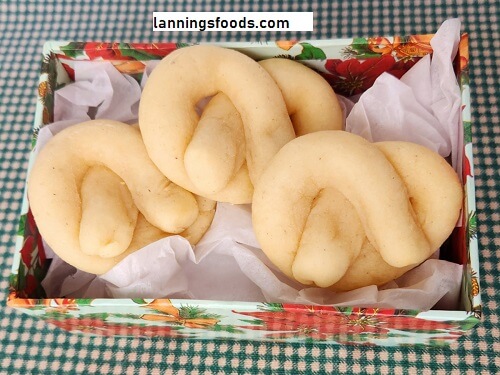
Another name for this traditional biscuit is krumkake, however, it comes from Northern Europe. Kringla, which translates to “ring” in Norwegian, describes the circular shape of the pastries. During my five years in Norway, most of our interactions occurred around Christmas or at weddings and other family get-togethers. Every family has their unique take on dough or decoration for this dish that has been passed down through the years.
With such basic components, kringle is also a simple treat to prepare, with many possibilities to customize the flavors and toppings. A flour, butter, and sugar dough is the basic recipe, from which almost all variations originate. Cream or milk can be added for tenderness. The finished product is delicate and rich, baking into a golden butteriness that is barely sweet.
Ingredients for Kringla:
Kringla Recipe:
- 4 cups of all-purpose flour: This is the structure we need to make it into dough.
- 1 cup granulated sugar: Makes the dough sweet and light.
- Buttermilk: I think of buttermilk as an extra-rich flavor. 2 sticks unsalted butter, softened at room temperature
- 1/2 sour cream or heavy cream: This gives the ends and part of their soft texture.
- 1 egg: binds the dough together, keeping it in a solid shape.
- 1 teaspoon of vanilla extract: Gives the dough a little more flavor.
- Baking powder 1/2 teaspoon: For some rise and tenderness in the cookies.
- And 1/4 salt: To bring out the flavor of your dough.
For the Topping (Optional):
Kringla Recipe:
- Granulated Sugar — 1/4 cup, for sprinkling over the tops of the cookies
- 1/2 teaspoon ground cinnamon [Warm, aromatic]
- Sliced almonds or chopped nuts (I usually go for 1/4 cup): For crunch and flavor.
How to Make Kringla:
Kringla Recipe:
1. Prepare the Dough:
Mix Dry Ingredients: Combine the flour, baking powder, and salt in a sizable bowl. Put aside.
Lightly whisk sugar and softened butter in a separate bowl using an electric mixer set at medium speed until frothy and light. For the version that my teammates and I produced, the procedure should take an average of three to four minutes.
Mix the wet ingredients in step one. Beat in the egg and vanilla extract until well combined.
Add Cream: Until the mixture is smooth, gradually stir in the heavy or sour cream.
Mix Dry Ingredients with Wet: Slowly stir in the dry ingredients mixture, starting with the flour and working your way up to the baking powder and salt. Combine the wet and dry ingredients; do not overmix as this may result in dense cookies.
Chill the Dough: The dough can be chilled for at least 30 minutes by covering the bowl with plastic wrap. It also makes the dough more workable and less sticky.
2. Shape the Kringla:
Kringla Recipe:
Step 2: Preheat the OvenPreheat oven to 350°F (175°C) Line three baking sheets with parchment paper, or silicone baking mats.
Shape the dough: Remove from the refrigerator and divide it into small sections. Roll each strip into 6-8-inch long ropes. Shape the rope into a circle, pinching ends together to seal. Transfer the shaped dough to your prepared baking sheets.
Place Kringla[s] on a parchment-lined or well-greased baking sheet and top with a sprinkle of granulated sugar mixed with cinnamon. Go a step further and top with sliced almonds or chopped nuts for an added element of texture.
3. Bake the Kringla:
Kringla Recipe:
Bake: Put the baking sheets in a preheated oven and bake for 12-15 minutes, until Kringla is browned around the edges.
Allow to cool on the baking sheets for a few minutes and then transfer them to a wire rack to complete cooling.
Tips for Perfect Kringla:
Kringla Recipe:
Use Ingredients at Room Temperature: Before creaming, make sure your butter is soft and at room temperature. This facilitates a smoother and more cohesive dough.
Chill the Dough: By lessening spreading throughout the baking process, chilling the dough will also help with handling.
To avoid tough cookies, only stir the dough until it’s well incorporated. Overmixing can cause the flour to become glutenous, giving it a rougher texture.
Altitude: If you live in a high-altitude area, you might need to modify the ratio of flour to baking powder. We mostly used this altitude baking guide; refer to it for specific instructions based on your needs.
Variations on Kringla:
As wonderful as regular Kringla is, you can also add a few things to give it an extra flair:
Lemon Kringla: Stir in 1 tablespoon of lemon zest and squeeze some juice from that wonderful little gem for great citrus notes.
Almond Kringle: add 1/2 c almond flour to the dough, before baking place sliced almonds on top.
Spiced Kringla — Try other spices, like some nutmeg or cardamom for added warmth and complexity to these cookies.
Chocolate Kringla: Stir in 1/2 cup of mini chocolate chips or drizzle cooled cookies with melted chocolate for an added decadent twist.
Serving and Storing Kringla:
Kringla Recipe:
Kringla can be tolerated on their lonesome or paired with refried accompaniments:
Kringla with Coffee or Tea: Kringla is a perfect afternoon treat when served with coffee or tea.4
On a Dessert Platter: Serve on a dessert platter with other cookies and fresh fruit for an impressive spread.
How to store Kringla: Allow the baked kringla to cool and place it in an airtight container at room temperature for up to one week. They can be frozen for up to 3 months if you need to store them longer. Pop the tray in your freezer and when frozen solid, store them for months in an air-tight storage bag.